Frappe Cloud
Marketplace
Search for an app
Frappe
Products
Insights
Installation Guide
installs
Publisher
Supported versions
Categories
E-Commerce
About
Swagger Generator for Frappe Apps
License: MIT
Overview
This project provides an easy-to-use Swagger UI generator for Frappe applications, enabling developers to automatically generate and explore API documentation.
Features
Automatic Swagger UI Generation: Automatically creates Swagger documentation for all API endpoints in your Frappe custom app.
Customizable: Specifically designed to work with APIs located in the
apifolder of each installed Custom Frappe app.Pydantic Model Integration: Seamlessly integrates with Pydantic models to display request body structures for APIs.
Setup Instructions
API Folder Structure:
Ensure your API functions are located in the
app_name/apifolder within your Frappe app. The generator retrieves API endpoints from this directory.Your project structure should look like this:
custom_app/
    ├── README.md
    ├── pyproject.toml
    ├── requirements.txt
    ├── custom_app/
    │   ├── api/
    │   │   ├── user.py         # API functions for user operations (POST, PUT, GET, DELETE)
    │   │   └── auth.py         # API functions for auth operations (POST, PUT, GET, DELETE)
    │   ├── basemodels/
    │   │   ├── user.py         # Pydantic models for user APIs
    │   │   └── auth.py         # Pydantic models for auth APIs
Generating Swagger JSON:
Navigate to the "Swagger Settings" doctype within your Frappe desk.
Click the "Generate Swagger JSON" button to create the
swagger.jsonfile, which contains the necessary API documentation.
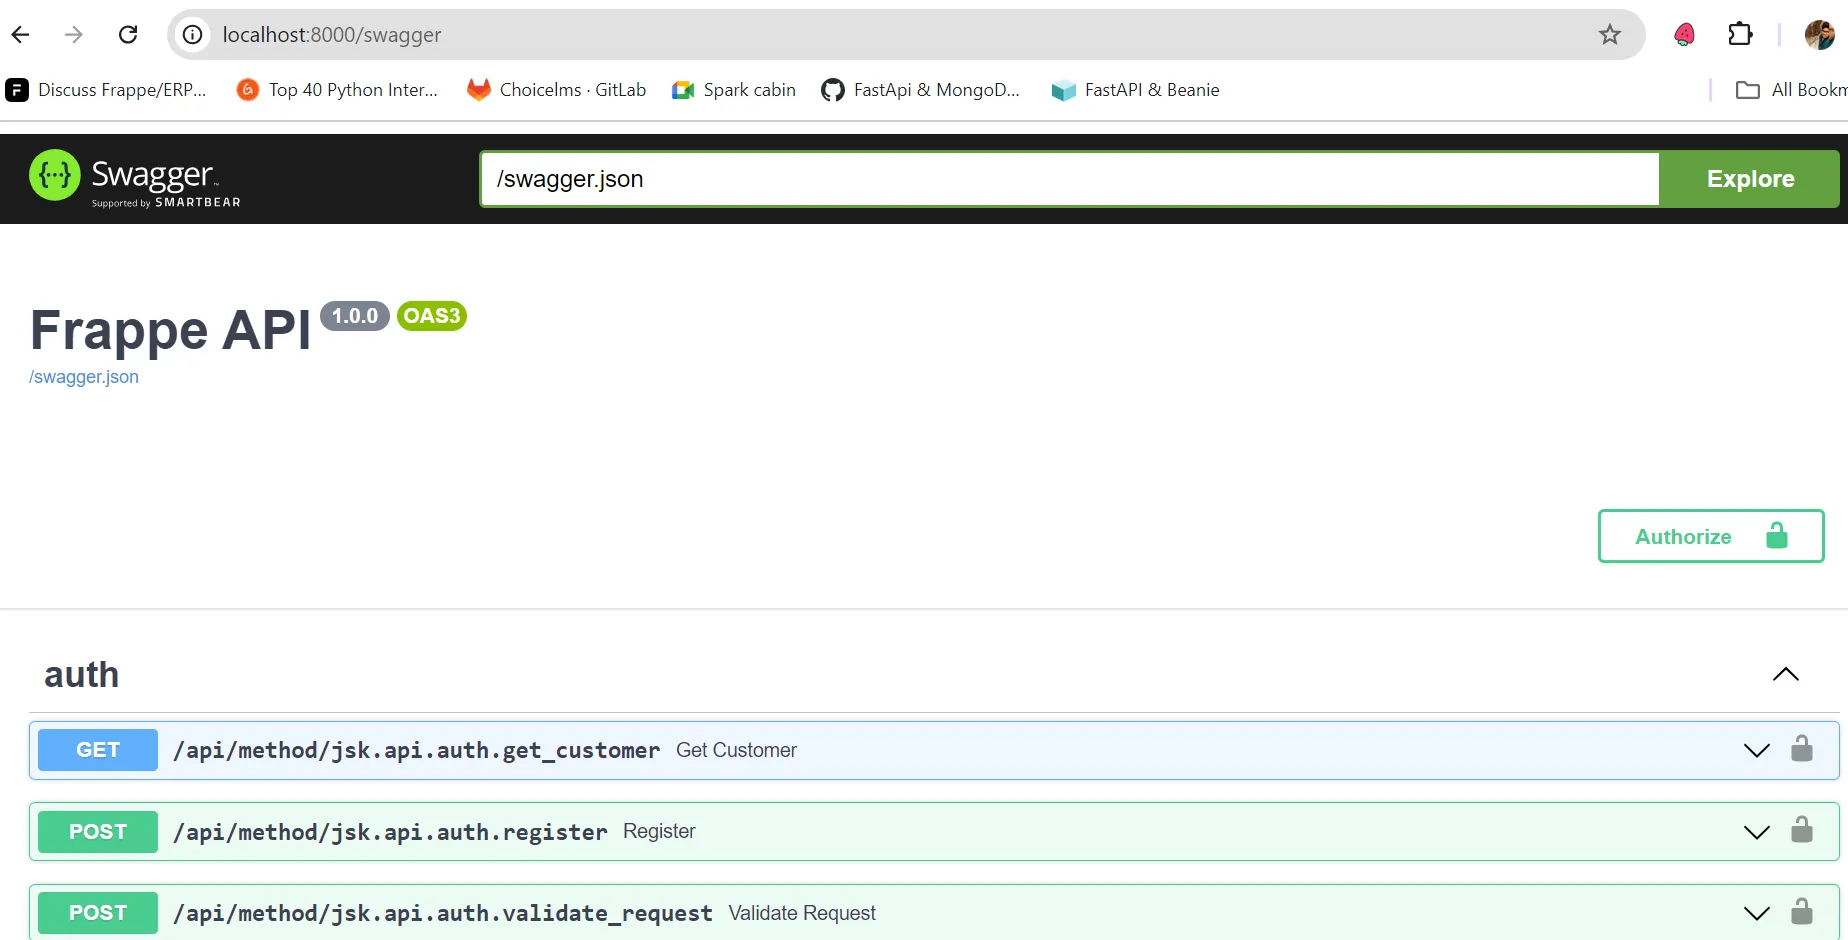
Accessing Swagger UI:
The Swagger UI is automatically generated and can be accessed via the
swagger.htmlfile, allowing you to interact with and test your API.
Steps to Use Swagger UI
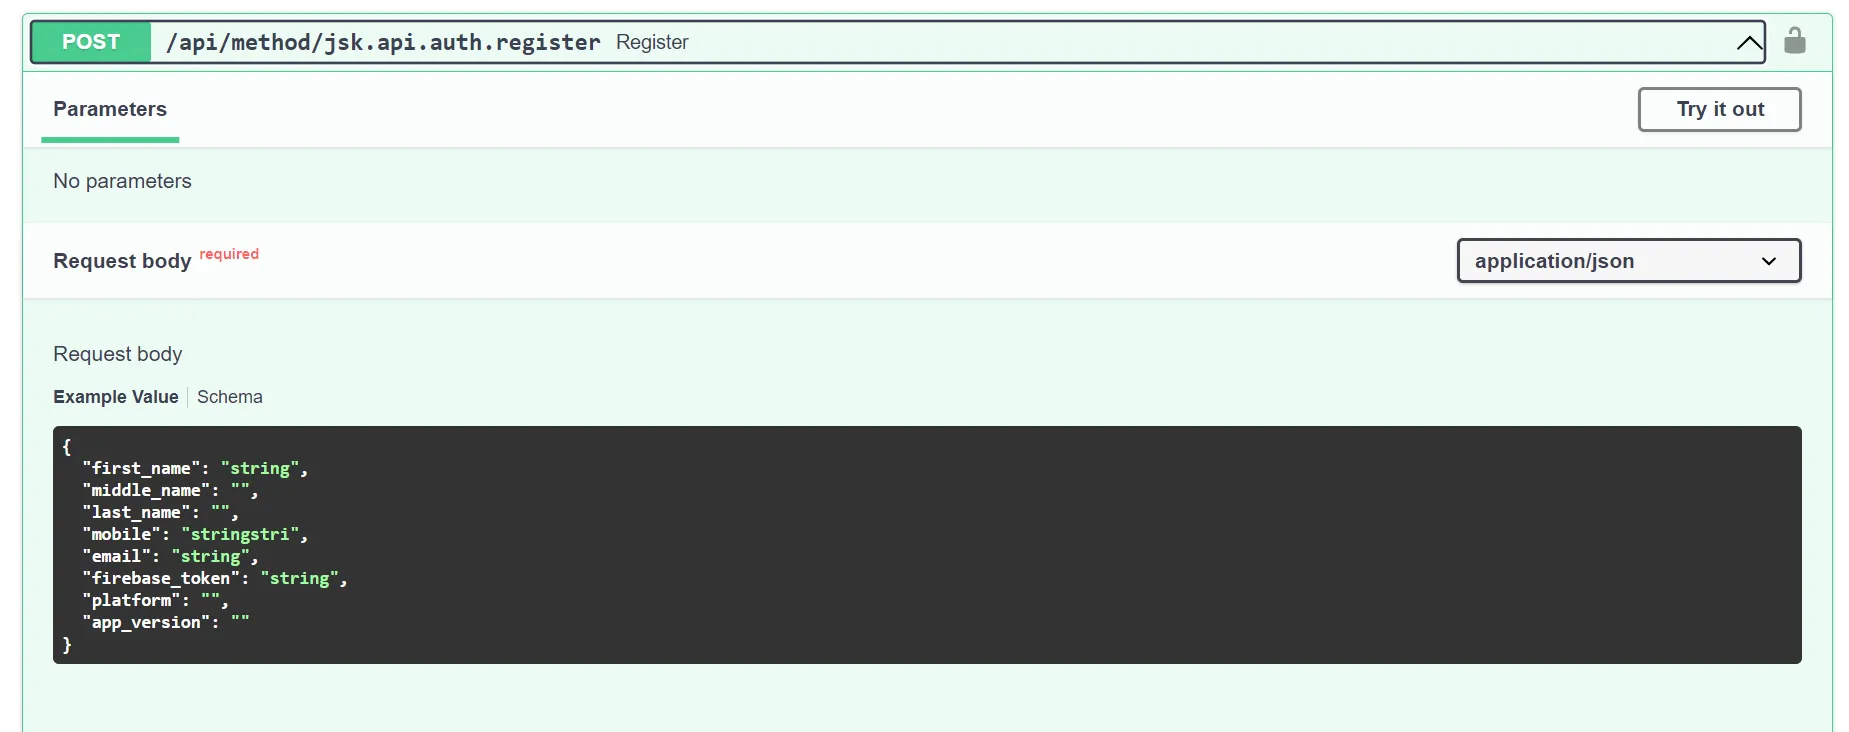
Define Pydantic Models for POST and PUT Requests:
import swagger
from pydantic import BaseModel
import frappe
from swagger import validate_request

class UserModel(BaseModel):
   email: str
   username: str
   age: int

@frappe.whitelist(allow_guest=True)
@validate_request(UserModel)
def add_user(validated_data: UserModel):
   try:
      swagger.validate_http_method("POST")
      new_user = frappe.get_doc({
            "doctype": "User",
            "email": validated_data.email,
            "username": validated_data.username,
            "first_name": validated_data.username,
            "age": validated_data.age,
      })
      new_user.insert(ignore_permissions=True)
      return {
            "status": "success",
            "message": "User created successfully",
            "data": new_user.as_dict(),
      }
   except Exception as e:
      swagger.log_api_error()
      return {"status": "error", "message": str(e)}

class UpdateUserModel(BaseModel):
   email: str
   username: str
   age: int

@frappe.whitelist()
@validate_request(UpdateUserModel)
def update_user(user_id: str, validated_data: UpdateUserModel):
   try:
      swagger.validate_http_method("PUT")
      user = frappe.get_doc("User", user_id)
      user.email = validated_data.email
      user.username = validated_data.username
      user.first_name = validated_data.username
      user.age = validated_data.age
      user.save(ignore_permissions=True)
      return {
            "status": "success",
            "message": "User updated successfully",
            "data": user.as_dict(),
      }
   except Exception as e:
      swagger.log_api_error()
      return {"status": "error", "message": str(e)}
Example of GET and DELETE API Requests:
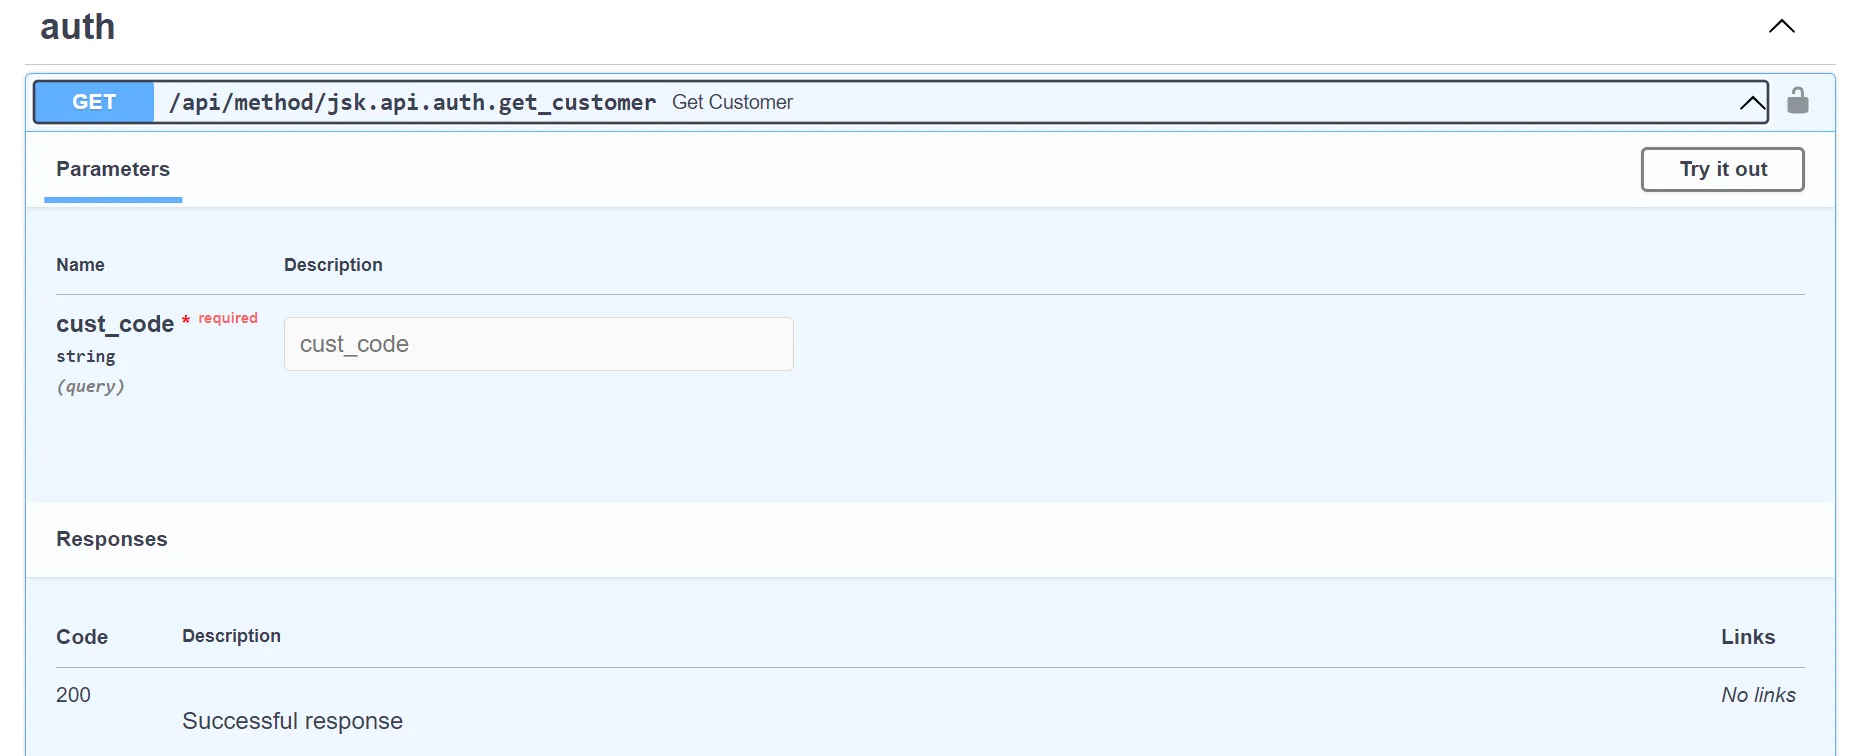
@frappe.whitelist()
def get_customer(user_id: str):
   try:
      swagger.validate_http_method("GET")
      customer = frappe.get_doc("User", user_id)
      return {"status": "success", "data": customer.as_dict()}
   except frappe.DoesNotExistError:
      return {"status": "error", "message": "User does not exist"}
   except Exception as e:
      swagger.log_api_error()
      return {"status": "error", "message": str(e)}

@frappe.whitelist(allow_guest=True)
def delete_user(user_id: str):
   try:
      swagger.validate_http_method("DELETE")
      frappe.delete_doc("User", user_id, ignore_permissions=True)
      return {"status": "success", "message": f"User with ID {user_id} deleted successfully"}
   except frappe.DoesNotExistError:
      return {"status": "error", "message": "User does not exist"}
   except Exception as e:
      swagger.log_api_error()
      return {"status": "error", "message": str(e)}
Customization and Automation
The Swagger generator is straightforward but can be customized and automated further. Feel free to modify the generator script to add more functionality or automate additional steps as needed.
Contributing
Contributions are welcome! If you find any issues or have suggestions for improvements, feel free to open an issue or submit a pull request.
License
This project is licensed under the MIT license, as outlined in the license.txt file.
User Reviews
No reviews yet, be the first to review.
0 rating
Explore more apps