Frappe Cloud
Marketplace
Search for an app
Frappe
Products
Insights
Installation Guide
installs
Publisher
Supported versions
Categories
E-Commerce
About
![]()
AutoInscribe
Seamless automatic data capture and integration solution
AutoInscribe is a tool for simplifying OCR that is built using Frappe Framework and requires a new or existing Frappe site (with ERPNext installed). It empowers users to streamline their workflow by seamlessly uploading business card photos for automatic extraction and storage of contact and lead information
Pre-Requisites
- Frappe Framework - v15 or above
- ERPNext - v14 or above
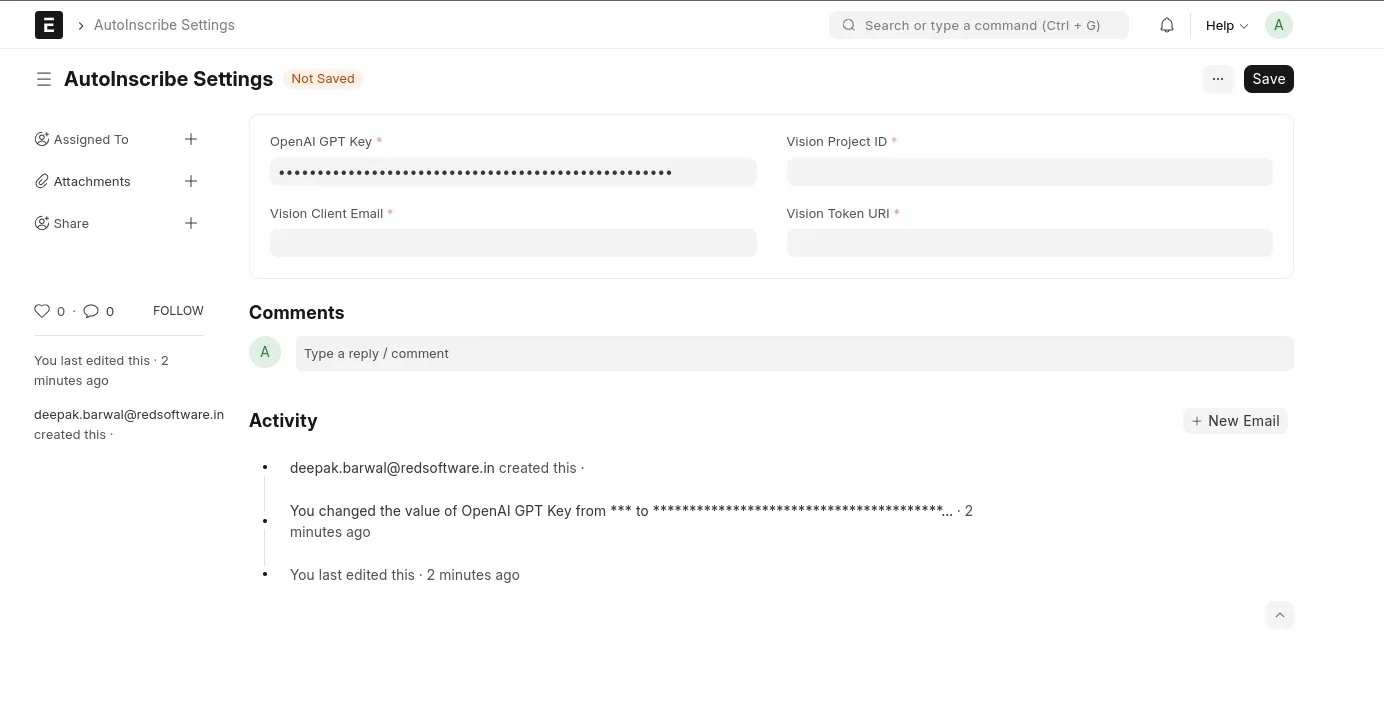
- OpenAI Account - First, create an OpenAI account or sign in. Next, navigate to the API key page and "Create new secret key", optionally naming the key.
- Google Vision API - Login to your Google Cloud Console and create a new project or select the existing one from under the Project tab. When the project is opened, click Navigation Menu and select “API & Services > Dashboard”. Now you need to enable Cloud Vision API. To do this, click the “ENABLE APIS AND SERVICES” button. In the search bar, search for Cloud Vision API and click it to enable. Now you need to create Google Cloud Vision key. To do this, click Navigation menu, select “IAM & admin > Service accounts”. In the window that opens, click “Create Service Account”.Set up the name, ID and optionally add the description. In the next step, set up a role or leave it by default and click “Continue”. In the last step, optionally grant users access to this service account and create the key. In the menu “Service accounts for project “Project Name”, click “Actions > Create key”. In the window that opens, select “JSON” as the key format and click “Create”. You will be prompted to automatically download the key.
Features
- Easily upload business card images directly into the system for automated data extraction
- Leveraging the power of Google Vision API, AutoInscribe swiftly extracts text from uploaded images, ensuring accurate retrieval of contact details like name, phone numbers, email addresses, and more
- Utilizing OpenAI's GPT technology, the app provides concise and comprehensive text summarization. This feature condenses extracted information into precise summaries, enhancing readability and usability
- Once text is extracted and summarized, AutoInscribe autonomously populates and saves the relevant fields in the Contact or Lead doctype within Frappe. This automated process saves time and reduces manual data entry, ensuring data accuracy and consistency
- User can configure the app settings using "AutoInscribe Settings" doctype


Installation for self-hosted users:
It can be installed via frappe-bench on your local machine or on your production site.
Once you have setup your bench and your site, you can install the app via the following commands:
```bash
development install
$ bench get-app https://github.com/redsoftware-hq/autoInscribe --branch develop
install on site
$ bench --site yoursite.name install-app autoinscribe```
Post this, you can use autoinscribe on your Frappe site by searching for AutoInscribe settings then entering your credentials and adding "vision_private_key": <your_private_key> in your site_config.json.
Local development setup
To set up your local development environment, make sure that you have enabled developer mode in your Frappe site config.
Usage
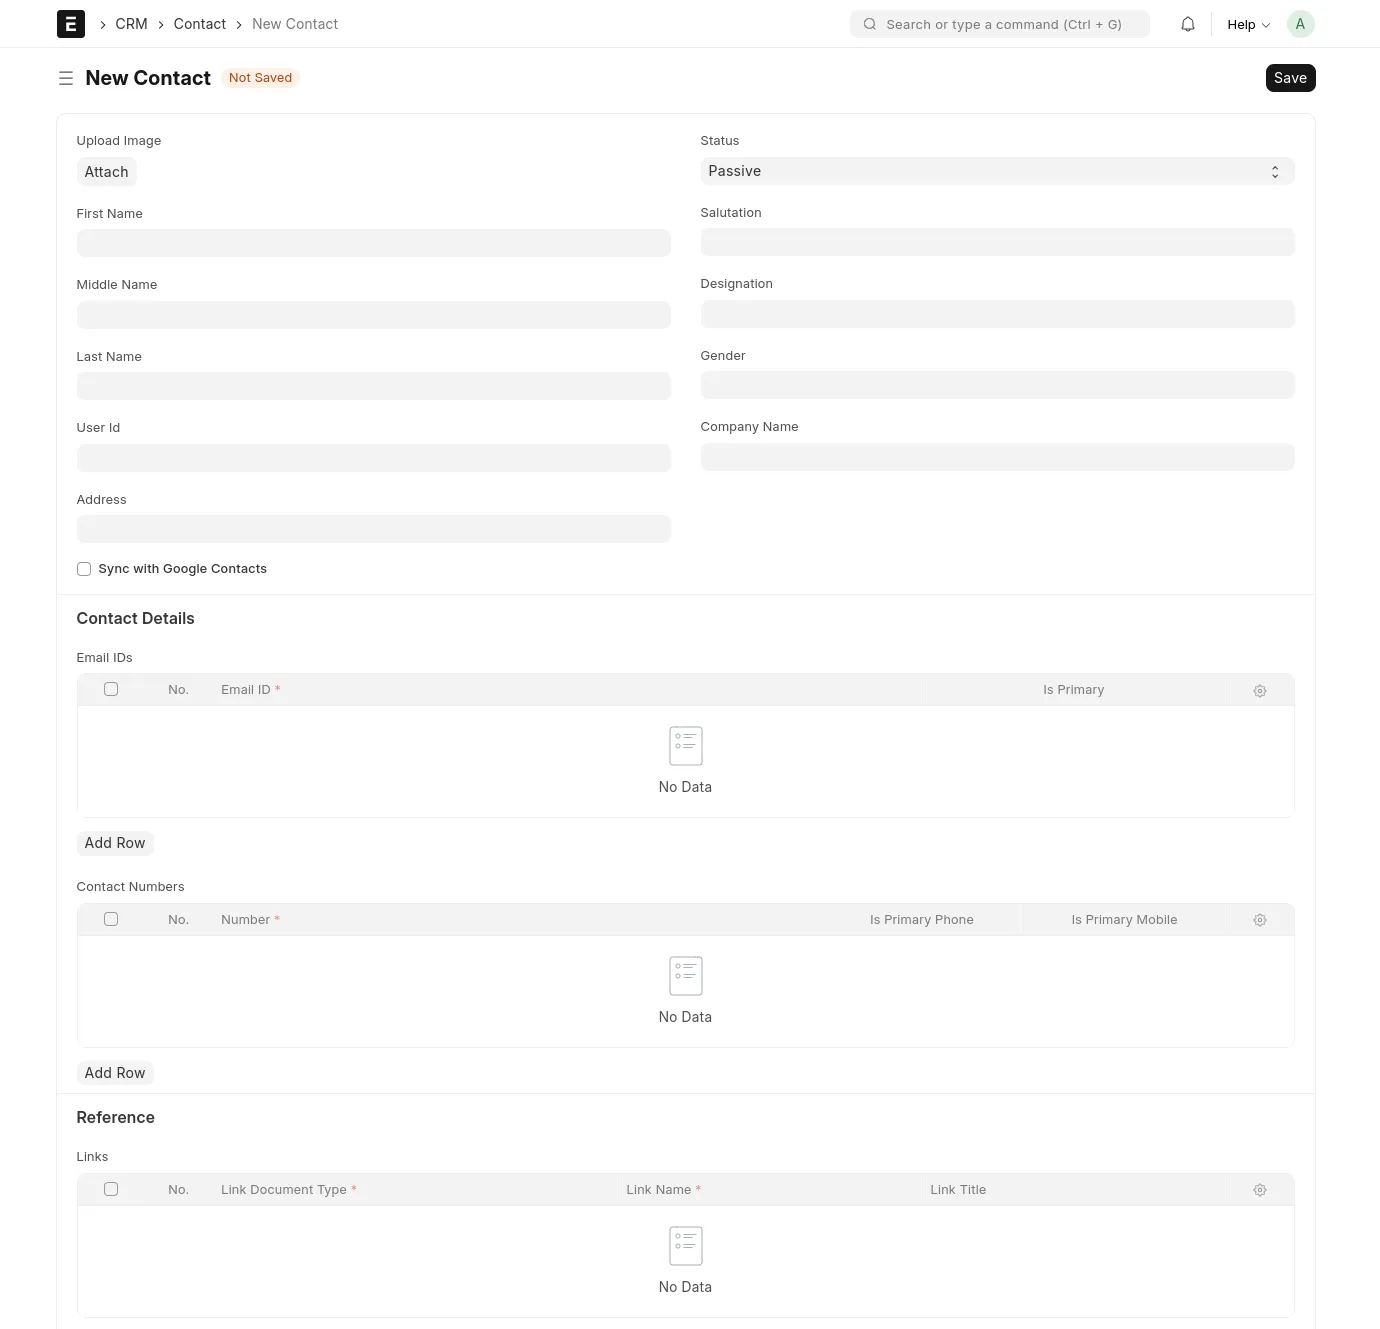
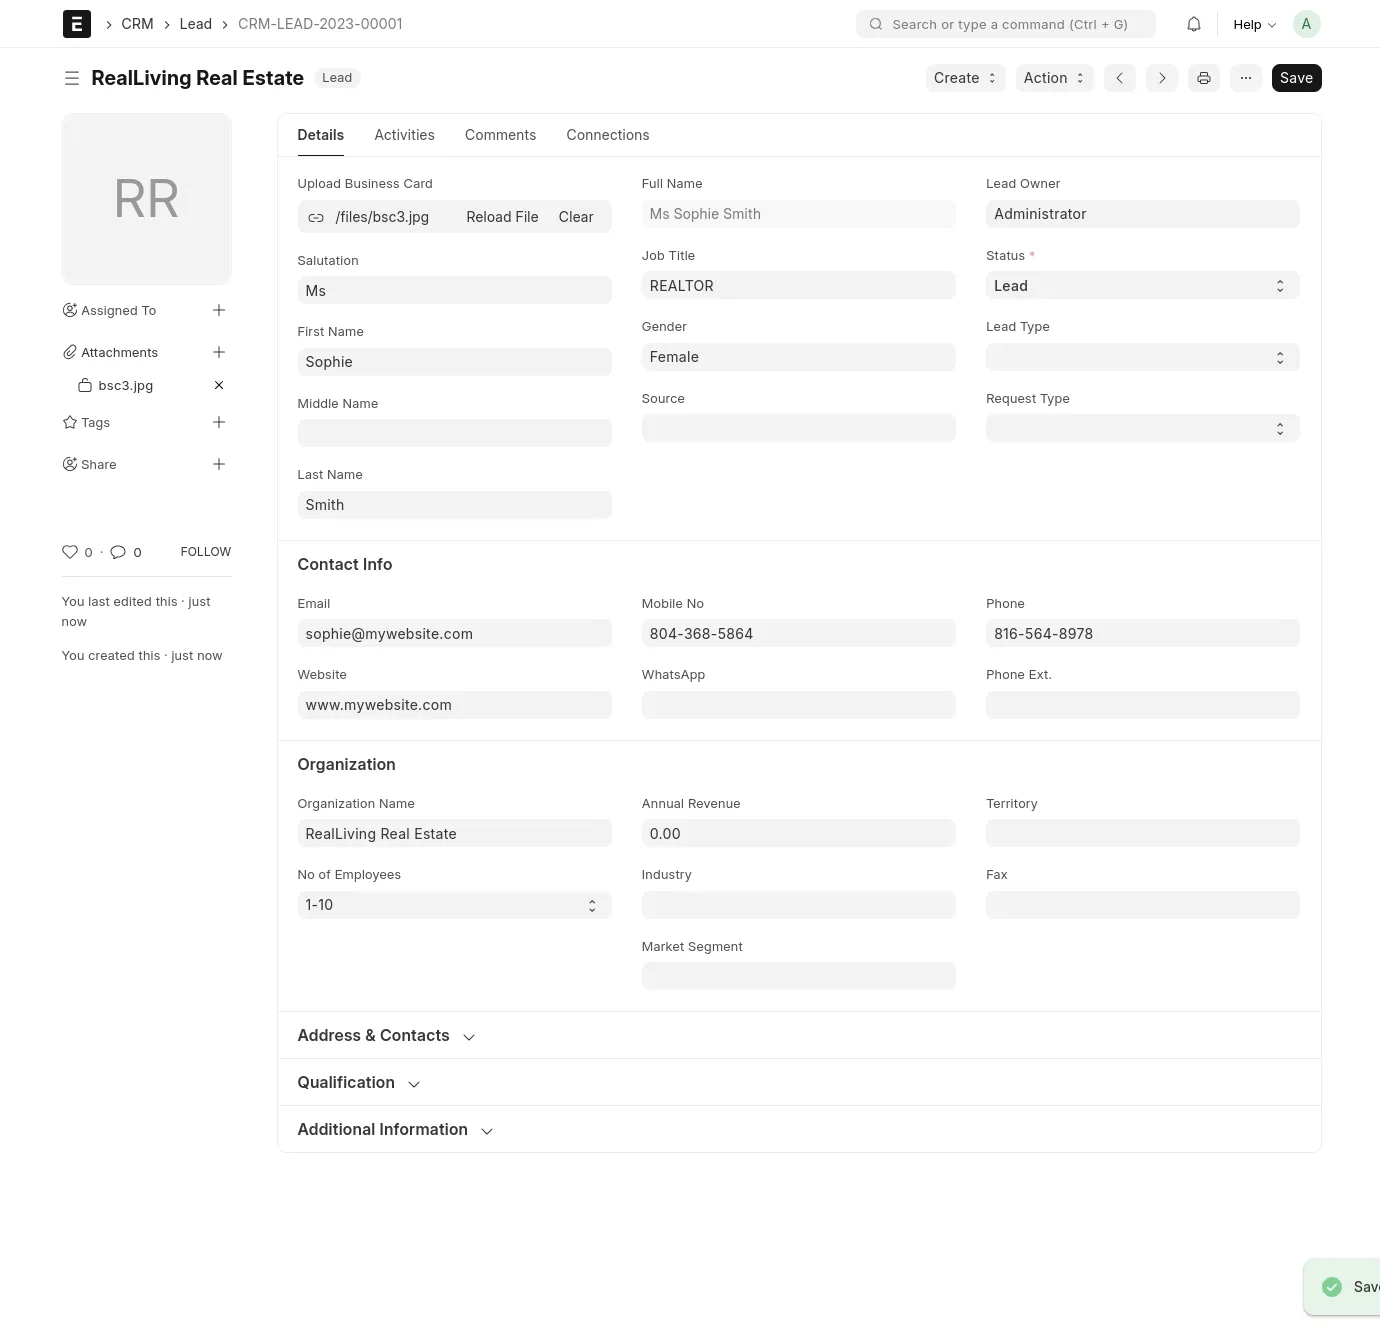
For now, we support only two doctypes: Contact & Lead.
After installing the app and providing all the secrets/keys, simply go to the "Add" screen of the supported doctype and you'll see an "Upload" field where you can upload the business card image of your choice, make sure to click "Set all public" as we only support public files for now. Then click upload and wait for the fields to populate.
Contributing
- Send PRs to
developbranch only.
Reporting Bugs
If you find any bugs, feel free to report them here on GitHub Issues. Make sure you share enough information (app screenshots, browser console screenshots, stack traces, etc) for project maintainers to replicate your bug.
License
AGPLv3
User Reviews
No reviews yet, be the first to review.
0 rating
Explore more apps